Understanding Ductless Mini-Split Installation
As homeowners increasingly seek energy-efficient heating and cooling solutions, the popularity of ductless mini-split systems has surged. These systems offer versatility and comfort without the extensive ductwork associated with traditional HVAC systems. Understanding the nuances of ductless mini-split installation is vital for anyone considering this option for their space.
What Are Ductless Mini-Splits?
Ductless mini-splits are modern heating and cooling systems comprised of two main components: an outdoor unit and one or more indoor air handlers. Each indoor unit can control the temperature independently, making mini-splits an ideal choice for homes needing zoning or for areas lacking ductwork.
Benefits of Ductless Mini-Splits
Adopting ductless mini-splits presents various benefits that enhance comfort and efficiency:
- Energy Efficiency: Mini-splits use inverter technology, allowing them to adjust the compressor speed, leading to lower energy consumption.
- Flexibility: Installations are adaptable to various spaces, including homes without existing ductwork or additions to existing systems.
- Improved Air Quality: Ductless systems bypass ducts, reducing dust and allergens circulating in the air.
- Quieter Operation: The outdoor units operate quietly, and indoor units can be specially designed to minimize noise.
- Zoning Capabilities: Each indoor unit can be controlled separately, allowing different rooms to maintain distinct temperatures—all enhancing comfort.
Key Components of Ductless Mini-Split Systems
Understanding the components of a ductless mini-split system is essential for successful installation and operation. Here are the primary parts:
- Outdoor Unit: Contains the compressor and condenser, crucial for heat exchange.
- Indoor Units: These air handlers distribute air into the living space and may come in various styles, including wall-mounted and ceiling-mounted units.
- Refrigerant Lines: Connect the indoor and outdoor units and transport refrigerant for heat exchange.
- Draining System: Responsible for removing condensation that occurs when cooling air.
- Thermostats and Controls: Facilitate user control over temperature settings and operational modes.
Preparing for Installation
Choosing the Right Location for Installation
Correct placement of indoor and outdoor units is crucial for optimal performance. Consider the following factors:
- Airflow: Ensure unobstructed airflow around the indoor units for efficient air distribution.
- Accessibility: Locate outdoor units where they can be easily accessed for maintenance.
- Noise Consideration: Keep outdoor units away from bedrooms and living areas to minimize noise disruptions.
- Space Availability: Determine the number of indoor units required based on the size and layout of your home.
Essential Tools and Materials Needed
Whether you choose a DIY approach or hire a professional, certain tools and materials will be essential for ductless mini-split installation:
- Level and measuring tape for precise alignments.
- Drills with appropriate bits to create holes for mounting.
- Wrenches and screwdrivers for securing connections between indoor and outdoor units.
- Vacuum pump and pressure gauge for refrigerant lines.
- Copper piping and insulation for the refrigerant lines.
Hiring a Professional Installer vs. DIY
Opting for a professional installation versus a DIY project heavily depends on your skill set and comfort level with HVAC systems:
- Hiring a Professional: Ensures a comprehensive installation; typically includes a warranty for the work.
- DIY Installation: Cost savings and flexibility, but requires understanding technical specifications and local regulations. Mistakes can lead to inefficiencies.
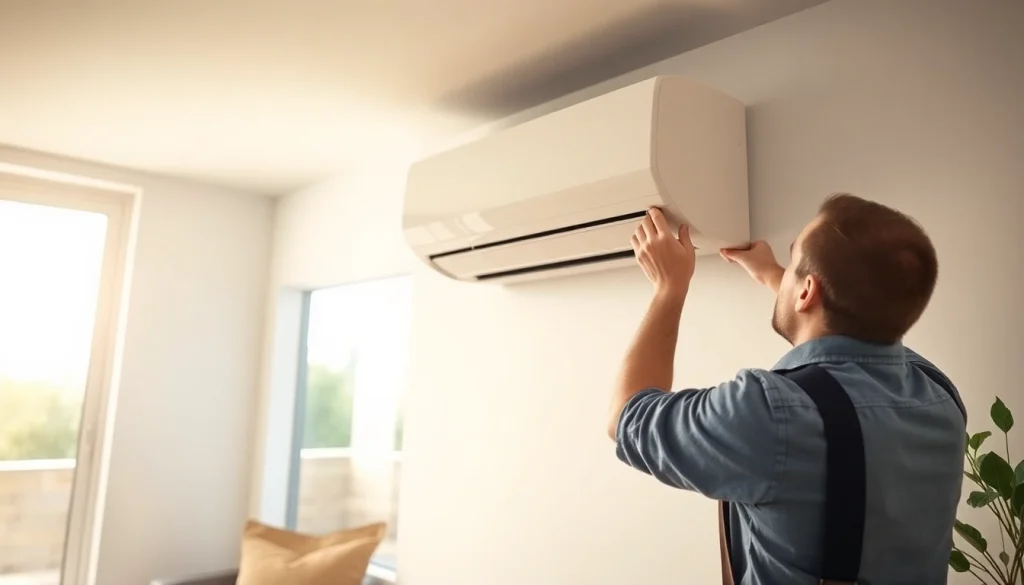
The Installation Process Explained
Step-by-Step Installation Guide
Installing ductless mini-splits can be systematic. Follow these general steps for proper installation:
- Choose the right location for both the indoor and outdoor units.
- Install the mounting bracket for the indoor unit, ensuring it is level.
- Drill a hole through the wall for the refrigerant lines, maintaining the recommended slope.
- Connect the refrigerant lines to the outdoor unit and run them through the drilled hole.
- Secure the outdoor unit on a base or wall bracket to prevent flooding.
- Connect the electrical wires and control wires according to the manufacturer’s instructions.
- Test the system to check for leaks and functionality before finalizing the installation.
Common Installation Challenges and Solutions
Every installation might come with its set of challenges. Here’s how to tackle some common issues:
- Alignment Issues: Use a level during installation to ensure proper orientation.
- Refrigerant Leaks: Check all connections carefully; use a leak detector if necessary.
- Noisy Operation: Ensure that the outdoor unit is mounted securely and placed away from noise-sensitive areas.
Safety Precautions to Consider
Safety is paramount during installation. Adhere to these precautions:
- Always turn off electricity before working on electrical components.
- Use safety gear such as gloves and goggles when handling tools and materials.
- If working at heights, ensure proper ladder safety and stability.
Post-Installation Best Practices
System Testing and Troubleshooting
After installation, assess the system’s performance to ensure it runs efficiently. Implement the following strategies:
- Run the unit in both heating and cooling modes to confirm proper operation.
- Check for unusual sounds which might indicate mechanical issues.
- Ensure all connections are insulated to prevent energy loss.
Maintaining Your Ductless Mini-Split System
Regular maintenance enhances the longevity and efficiency of your ductless mini-split system. Essential maintenance routines include:
- Cleaning the filters monthly to promote airflow.
- Inspecting and cleaning the coils to prevent blockage.
- Scheduling annual checkups with a qualified technician for system performance assessment.
Optimal Settings for Energy Efficiency
To maximize energy savings, consider these optimal settings and habits:
- Set the thermostat to a higher temperature in summer and lower in winter.
- Avoid extreme temperature settings, as they can waste energy.
- Utilize timers and smart technology to adjust settings based on your schedule.
FAQs About Ductless Mini-Split Installation
How long does ductless mini-split installation take?
The installation typically takes 4 to 6 hours, depending on the number of units and the complexity of the installation.
Can I install a ductless mini-split system myself?
While DIY installation is possible, it’s recommended to hire a professional for complex systems to avoid costly mistakes and ensure efficacy.
What size ductless mini-split do I need?
Choosing the right size depends on the square footage of the area to be cooled or heated; consulting a professional can help identify the best fit.
Are ductless mini-split systems energy efficient?
Yes, ductless mini-split systems are highly energy efficient, often boasting SEER ratings of 20 or higher, which can significantly lower energy bills.
What maintenance is required for ductless systems?
Regular filter cleaning, annual professional inspections, and ensuring unobstructed airflow are vital for maintaining efficiency and performance.